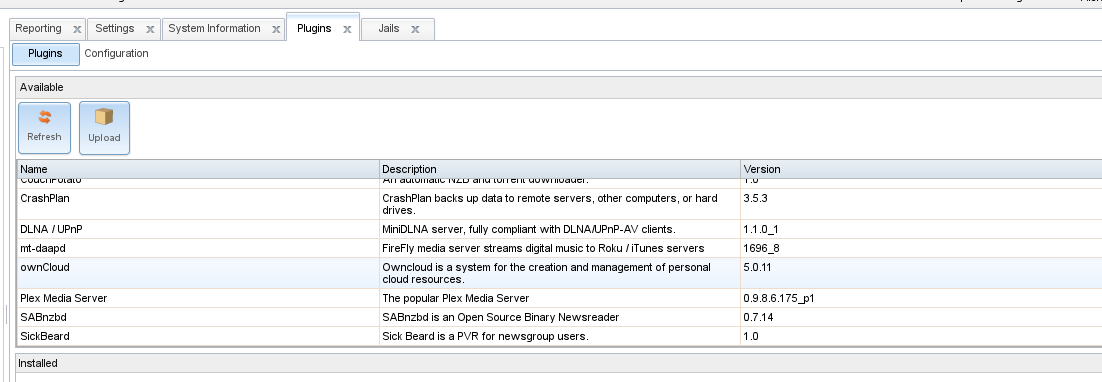
I was using miniDLNA on FreeNas, but several days ago I saw that the Plex media server was available as a plug-in. (Actually there are quite a few extra plug-ins available)
Plex has received a lot of good reviews and it looked like a smooth way of serving out about 100GB+ of assorted media that is sitting around on my FreeNas.
Installing Plex
Installation is simply done by clicking on the package and then selecting install. After a couple of minutes the new plug-in jail will be created.
Configuring the Jail
This is optional. I would imagine that most people will have no issues with the default IP address etc, but I’m keeping all my media devices (TV/AV Receiver/Blu Ray/Media Servers) in a small IP range running from 192.168.10.40-49.
Make a note of the IP address, you’ll need it later to connect to the web interface.
Stop the jail from the dashboard, and then click on edit to update the IP address. Because I’m using dnsmasq to provide the name services on the local network, I needed to add this jail to the list of hosts so that I can refer to it by name in any browser on the local network.
Add to the list of hosts in the dnsmasq jail. (Here’s my post on installing dnsmasq in a jail). Now I can just type “plex” to get to it.
Creating the media library
My media is all sitting on the FreeNas, so I just need to make it available to the Plex Server.
If you have a directory structure that has all the files in a single directory, you only need to add the top level directory as storage to the Plex server.
I chose to put the files in the /media directory on the Plex jail. However, my media files are in separate top level directories, so in order to make everything available to Plex, I needed to add several storage containers.
In order for everything to appear under the /media directory, I connected to the FreeNas box and changed to the jail. Find the number of the jail by using the jls command.
The names are self-explantory. If you have different users with different music collections, you may want to structure this differently so that people only connect to their own collection.
freenas# jls
   JID  IP Address      Hostname                      Path
<snip>
    23  -               plex_1                        /mnt/volume1/jails/plex_1

freenas# jexec 23 /bin/csh
root@plex_1:/ # cd /media/
root@plex_1:/media # ll
total 0
root@plex_1:/media # mkdir music video photo
root@plex_1:/media # ll
total 5
drwxr-xr-x  2 root  wheel  2 Oct  6 22:29 music/
drwxr-xr-x  2 root  wheel  2 Oct  6 22:29 photo/
drwxr-xr-x  2 root  wheel  2 Oct  6 22:29 video/
I then restarted the jail (you can add storage whilst a jail is running, so if you didn’t stop it to change the IP address, your jail will already be running).
Oh No! Why can’t I see it?
Once the jail had restarted, I attempted to connect to the web interface to add the media directories I had installed, but the connection kept failing. Time to troubleshoot….
Using the jexec nn /bin/csh command from the FreeNas shell session I tried the service command to find the status.
root@plex_1:/ # service plexmediaserver status
Cannot 'start' plexmediaserver. Set plexmediaserver_enable to YES in /etc/rc.conf or use 'onestart' instead of 'start'.
(and because the correct setting in the /etc/rc.conf file wasn’t present, the start command didn’t work either).
root@plex_1:/ # service plexmediaserver start
Cannot 'start' plexmediaserver. Set plexmediaserver_enable to YES in /etc/rc.conf or use 'onestart' instead of 'start'.
Add the following line to the /etc/rc.conf file using echo (or you could edit the file manually also)
root@plex_1:/ # echo 'plexmediaserver_enable="YES"' >> /etc/rc.conf
I don’t know why this was missing, but it was an easy fix. So trying again..
root@plex_1:/ # service plexmediaserver start
Starting plexmediaserver.
root@plex_1:/ # service plexmediaserver status
plexmediaserver is running with pid: 42807
so the server is running.
Let’s Try Again
Connect via you web browser to the IP address of the jail you created (the address you wrote down in the first step). Replace the IP address here with your IP address
http://192.168.10.46:32400/manage
If you have set up dnsmasq with a name for the server, you can also use:
http://plex:32400/manage
The numbers after the colon (32400) is the number of the port that the server listens to. Normally web services run on ports 80 (http) or 443 (https), so navigating to the web interface does require you remember to manually enter the correct port.
If you’ve got everything installed, you’ll see a very slick looking start screen and you will be guided through the steps of creating the media libraries.
Engadget has a good guide here describing how to configure the Plex Media Server, but to be honest, the development team at Plex have designed the web interface really well and the steps you need to take are clearly and easily presented.
The initial scan will take some time, especially if you have a large library. You can click on the activity button at the top right of the screen to watch the process.
The time needed to install this was about 30 minutes, including the trouble-shooting. The library scan took quite a while longer, but as Plex discovered and indexed the media it became available to the DLNA clients.
My DLNA client doesn’t always see the plex server when I try to connect from my smart TV.
This happened to me also, but when I restarted the plex media server I could see it again.
service plexmediaserver restartYou could add this as a cron job and restart it every day in the middle of the night (that’s what I do & it seems to be working now). That’s a cron job within the jail, BTW.
You could also restart the jail.
I don’t know why it seems to disappear from view.